I want to inspire those photographers who think high end camera gear is a prerequisite to taking amazing photos. If you are one those photographers you are wrong! I’m going to tell you the secrets I use that help lead me to taking inspiring images with a camera setup that cost me less than $1,000.
Arriving to a location early is important, and here’s why: the early bird gets the worm, as we all know. The worm I happen to be chasing is one with unique angles and light souting the area allows me to line up compositions so I am not scurrying around when the perfect light arrives.
I took the following shots with:
Nikon D7100 ($350 Used)
Nikon 18-70mm | f/3.5-4.5 ($100 Used)
ProMaster Polarizer ($70)
Slik Travel Tripod ($90)

Research, Research and More research
After researching I found this was a sunrise location since the mountain tops catch the alpenglow in the morning and popular spots like Schwabachers Landing tend to attract hordes of photographers. I arrived hours before sunrise to scout the location, but more importantly to claim my spot before dozens of photographers arrived.
Look for Unique Conditions
A massive Nor’easter storm came through and dumped rain for several days. The torrential downpours created massive puddle that knows me, knows how much I love my puddles. Capturing rare conditions at popular locations with incredible light is the perfect recipe for a banger


Patience is a Virtue
I have the tendency to be impatient at times. It is a lesson I am still trying to learn and it paid off for the above two images. I made sure I was at this location hours before sunset setting up my tripod on top of my car to get a higher vantage point, all that was left to do was wait. When all hope seemed lost, out of nowhere clear skies turned to perfectly golden lit clouds for sunset and immediately turned into a beautiful lenticular cloud at blue hour. The last piece of the puzzle was waiting for the right car, going the right speed to really emphasize the curves with light trails.

Tide time Charts
Tide charts and times are always important to research before heading to any coastal location those perfect reflections on the beach means timing the tide just right I use a free app “Tides” to help plan out my shots.


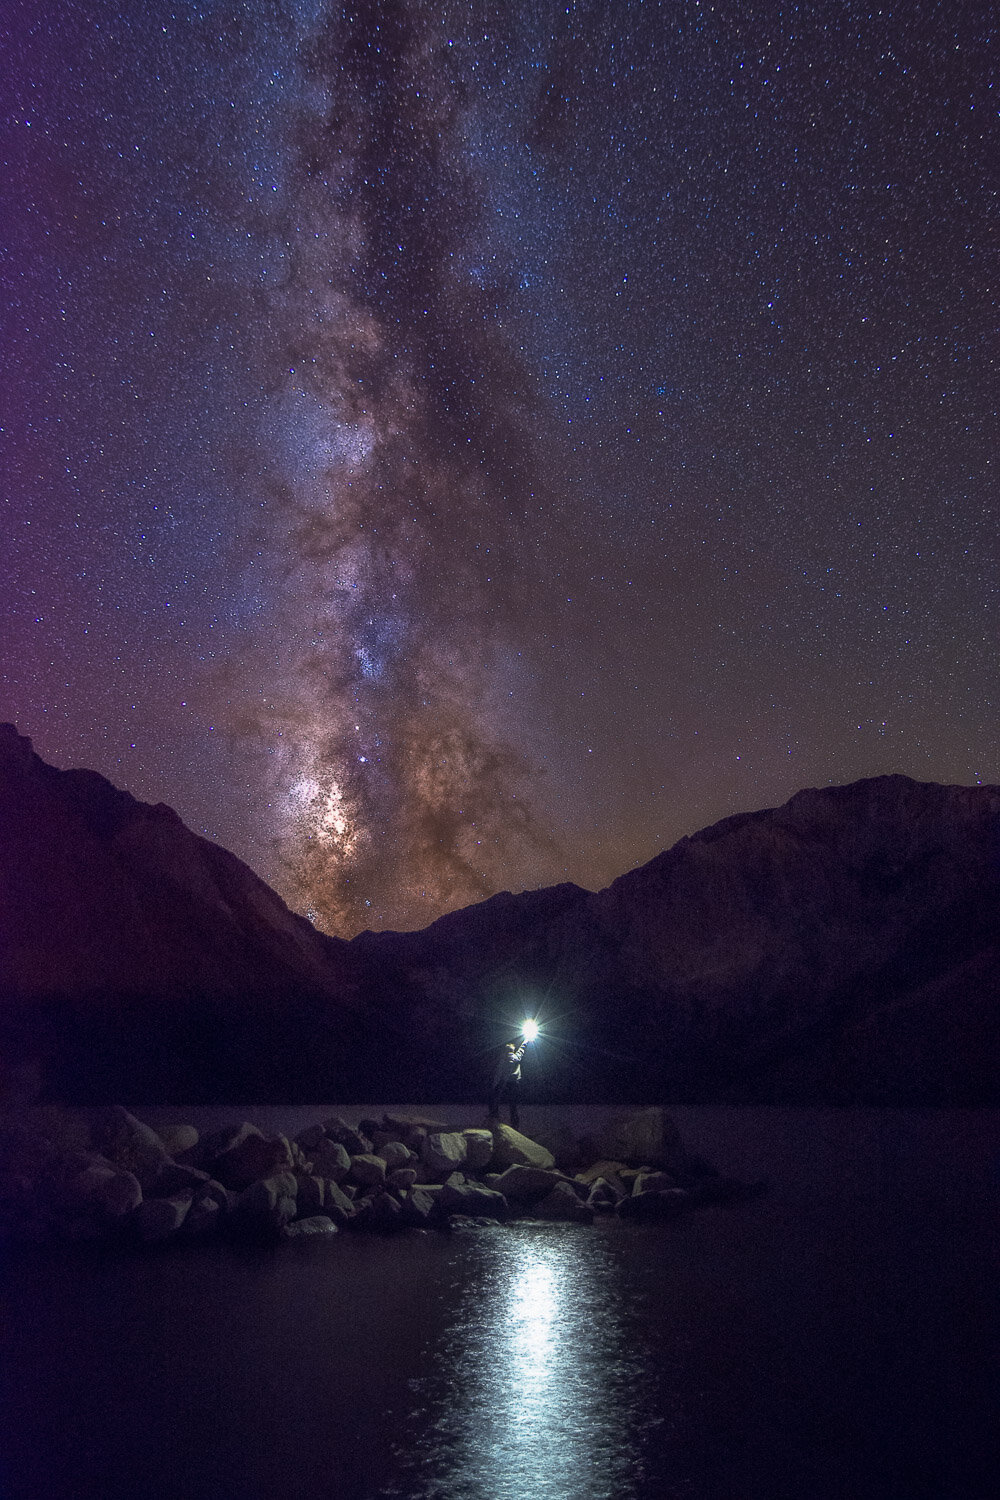
Add an Element
Place a person in your composition to help show scale and tell a story adding a human element adds a unique aspect to an image.

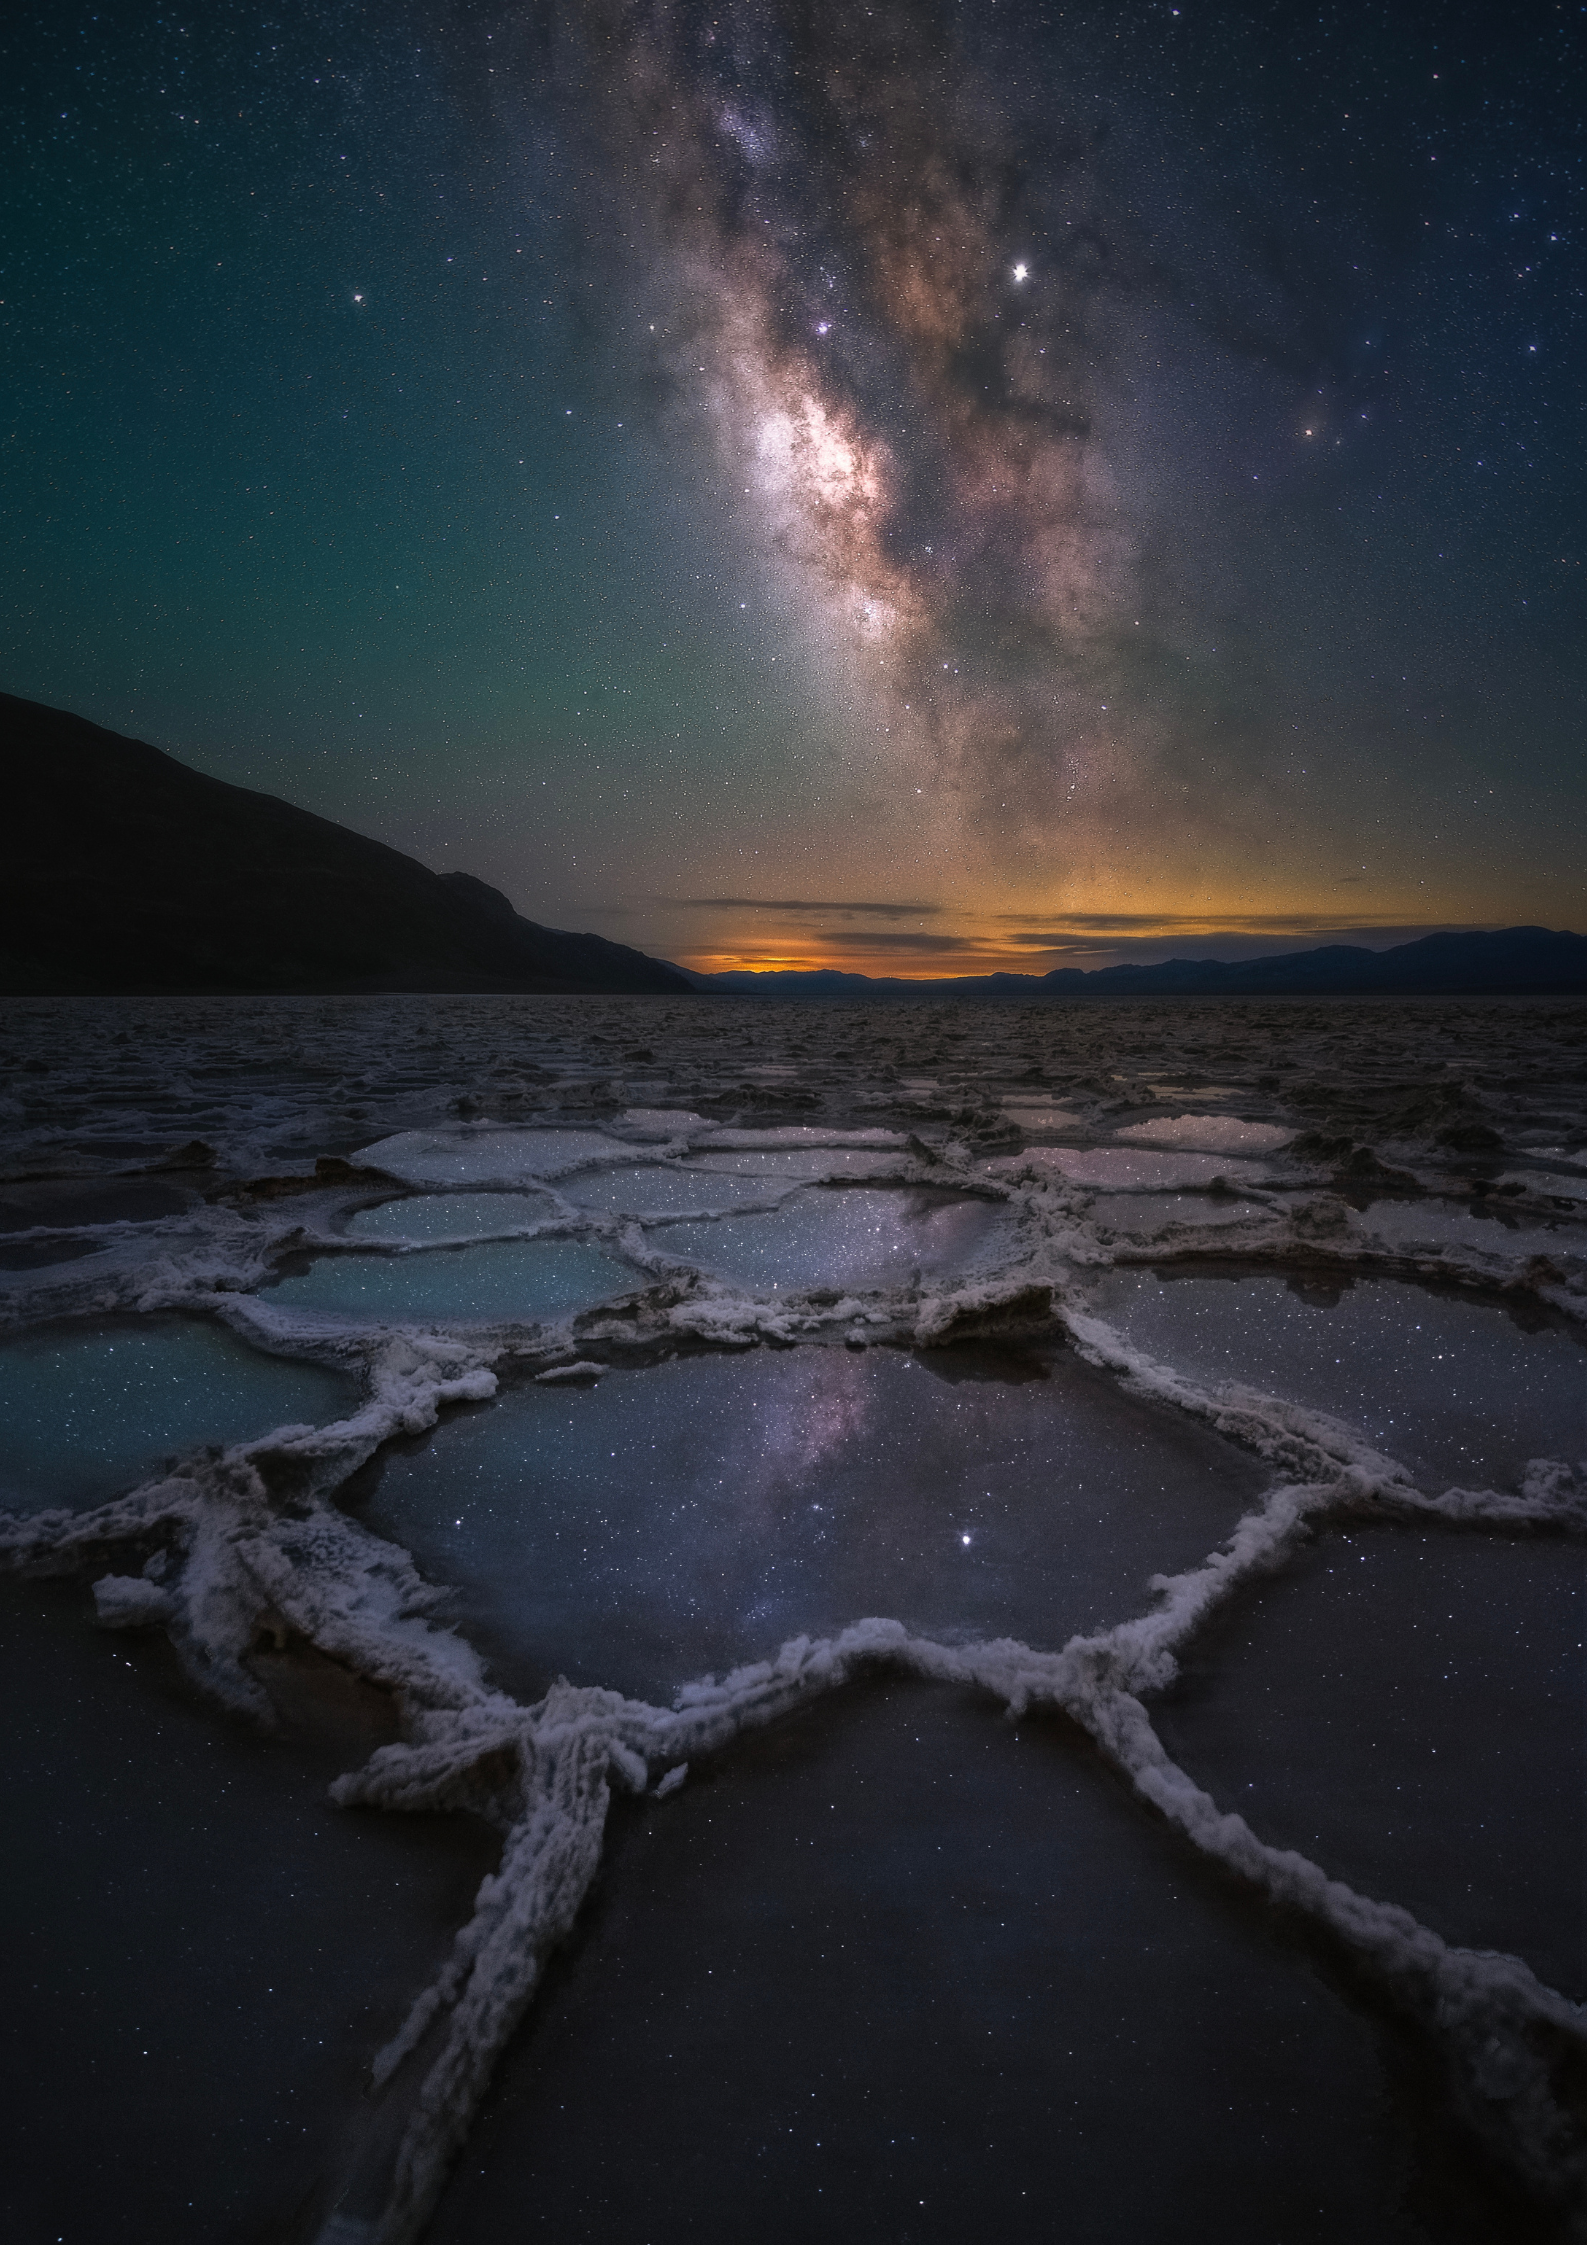
Photographing the Milky Way
Researching and scouting becomes even more important when it comes to photographing the night skies. I always use the app “PhotoPills to find when blue hour begins the moon phase and the location of the Milky Way.
On top of researching use a stacking method to greatly improve the quality of my night images. In addition to Lightroom and Photoshop use an app on my Mac “Starry Landscape Stacker”($40) to stack those high ISO shots which reduces noise.
To photograph the Milky Way I also needed some slightly upgraded equipment but nothing that broke the bank and I took the shots below with the addition of a wide angle lens - Tokina 11-16mm | f/2.8 ($300 Used).


I captured all of these images with a total setup cost of less than $1,000! For the longest time I carried my cropped Nikon D7100 camera two lenses a polarizer and a tripod.
It’s easy to get caught up in thinking you need the best camera the best lenses and all the accessories to create that quality image. Don’t let the quality of your gear stop you. Instead of upgrading your equipment, take all that money saved and travel more!