I am always looking for shortcuts and quick hacks to make my editing workflow faster. Here are my top 10 most used Lightroom hotkeys that make my workflow more streamlined and efficient:
1. Before & After View - ‘/‘
If you want to check what your edited version looks like compared to your original, press ‘/’ to toggle between the before and after.
2. Black Out Mode - ‘L’
To help get a cleaner view of your image, press ‘L’ once to grey out the background. This view darkens the background but still allows you to see the adjustment bars on the right. Press ‘L’ again to completely black out your background. Press' ‘L’ one more time to return to the normal view.
3. Show Clipping - ‘J’
To easily see your clipped highlights and shadows, press ‘J’. The more you clip, the more colors will show up. Also, to see clipping while adjusting individual bars, hold ‘option’ (ALT on PC) while dragging the exposure, highlights, shadows, blacks and whites bars. As you drag, more and more clipping will show where you are clipping.
4. Graduated Filter - ‘M’
To give the same effect as a graduated ND filter, activate the gradient filter tool by pressing ‘M’. This is one of my favorite tools that really helps me shape and guide light. Try dropping a graduated filter in the sky and decreasing the exposure by -.40 to give a nice, even exposure.
5. Radial Filter - ‘Shift + M’
To activate the radial filter tool, press ‘Shift + M’. This tool is great for spot lighting part of the image or creating vignettes. Try placing a radial filter over the subject of your image, make sure the invert button is unchecked and decrease exposure to bring more focus on your subject.
6. Adjustment Brush Tool - ‘K’
The Adjustment Brush allows you to make changes much more accurately. You can brush in very localized edits and is a great way to fine tune your image. To activate this tool, press 'K'.
7. Increase/Decrease Brush Size - ‘]’ or ‘[‘
For a quick way to change the size of you adjustment brush or eraser, press ‘[‘ to make your brush smaller or ‘]’ to make your brush bigger. To adjust the feathering (softness), press ‘Shift + [‘ for a harder brush or ‘Shift + ]’ for a softer brush.
8. Show Mask Overlay - ‘O’
While using the gradient filter, radial filter or adjustment brush, press ‘O’ to toggle the mask overlay on and off. Everything being affected by the filter or brush will be highlighted red.
9. Hide All Pins - ‘H’
While using the filters or brush, sometimes the pins showing the locations of the filters and brushes can be distracting. To get a cleaner view without the pins, press ‘H’ to hide them all.
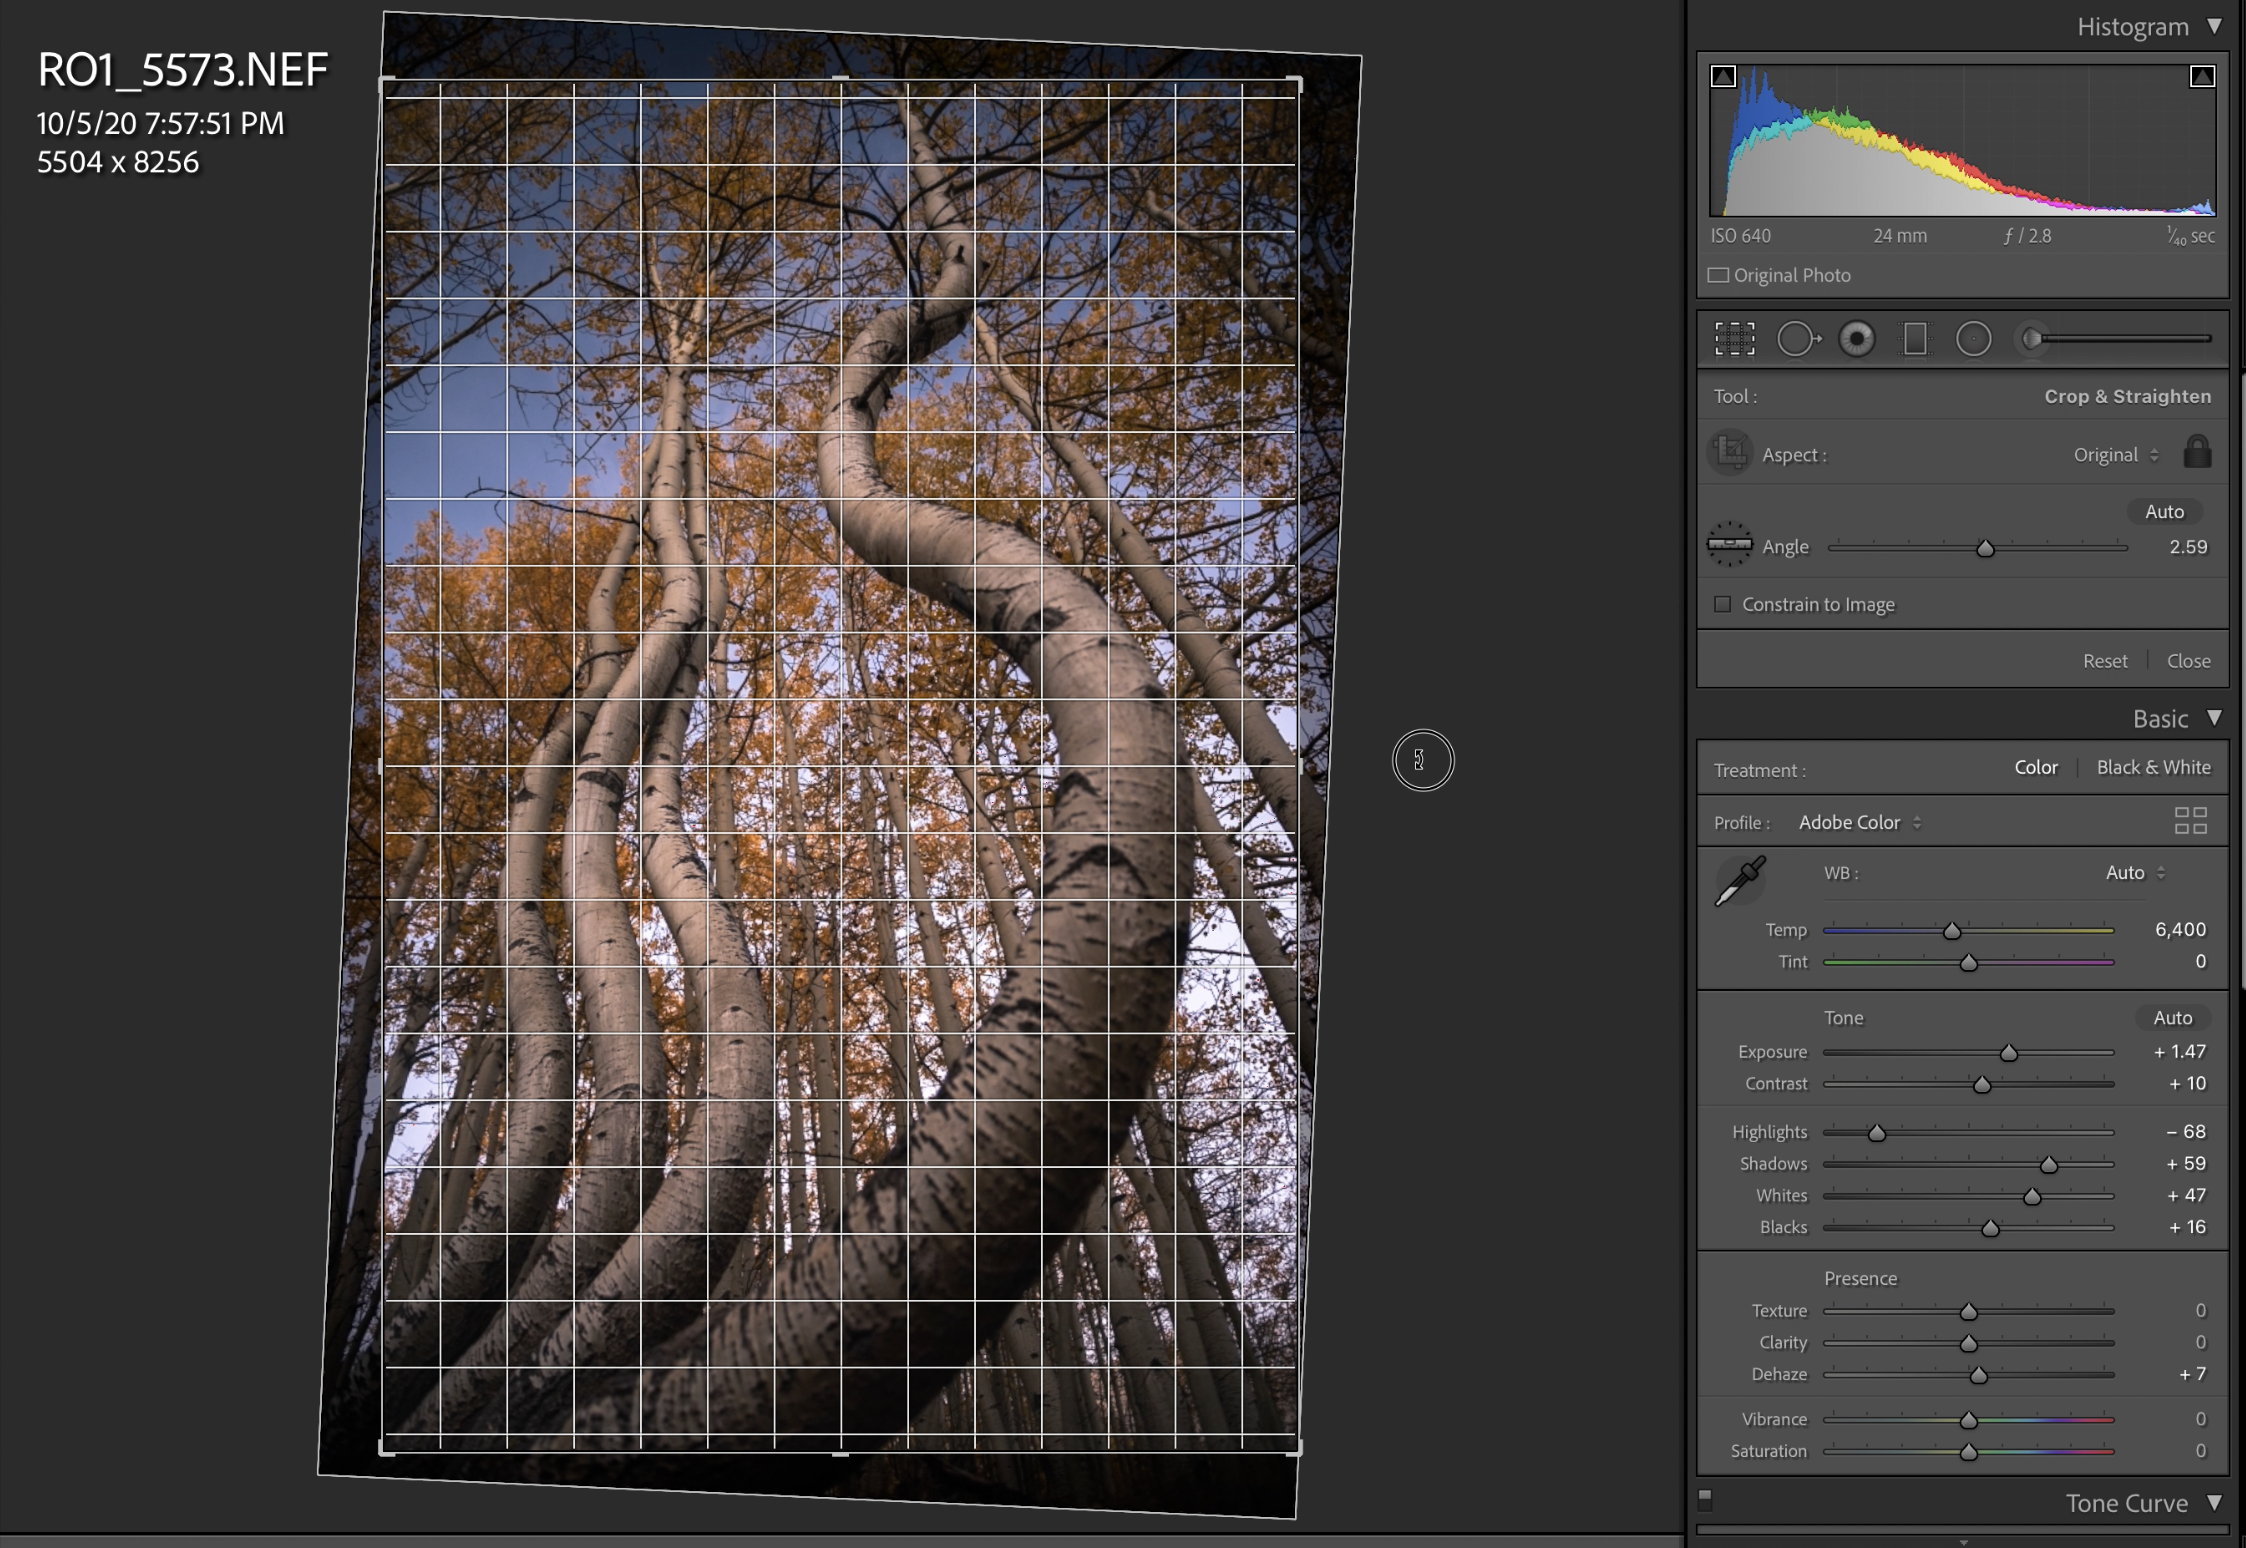
10. Crop & Straighten Tool - ‘R’
To adjust your crop or straighten your image, press ‘R’. From here, you can choose from standard preset dimensions from the drop down menu or choose your own custom crop by dragging the edges to your preferred liking (Press ‘A’ to lock and unlock the aspect ratio). You can also straighten an image by using the rotational tool or clicking the ruler and dragging along the horizon line.